Showing posts with label Linen. Show all posts

Wednesday, April 17, 2019

Two Fabrics, One top - The Floreat

The Floreat Top paired with Emerson Pant made out of linen!

There are so many creative possibilities when we sew, learn, and experiment with the fabric we love! The Floreat by Megan Nielsen is an asymmetrical dress or top that can be made out of either a knit or a woven fabric. Most patterns have to be adjusted to have this dual use, but this simple pattern, with clean lines, is extremely versatile and perfect for spring.


Laurel and I chose one knit and one woven fabric to make this top. We can't wait to see how they compare and how each top fits into our handmade wardrobes!


So many views to play with!


So we thought we'd test it out.  For the knit version, we chose the crop version  (View C) with short sleeves.  Our fabric is a soft organic cotton and hemp knit with a gentle slub texture. With so many high quality knits available, it's hard to choose! 


Love this color range on the Organic Cotton & Hemp Jersey at Stonemountain
Olive, Denim Blue, Terra, Shell, White, Black, Mauve, Brick Red, Red, and Navy!

If you've been sewing for a while, you do know that you can virtually make an entire knit garment using only your serger.  It takes practice, but the finishing on the inside is tidy and very professional looking.


Keep your pins close together and pull them out as you go along - even a sleeve can be set in using a serger...and remember...

SERGERS DO NOT GO OVER PINS!! LOL!
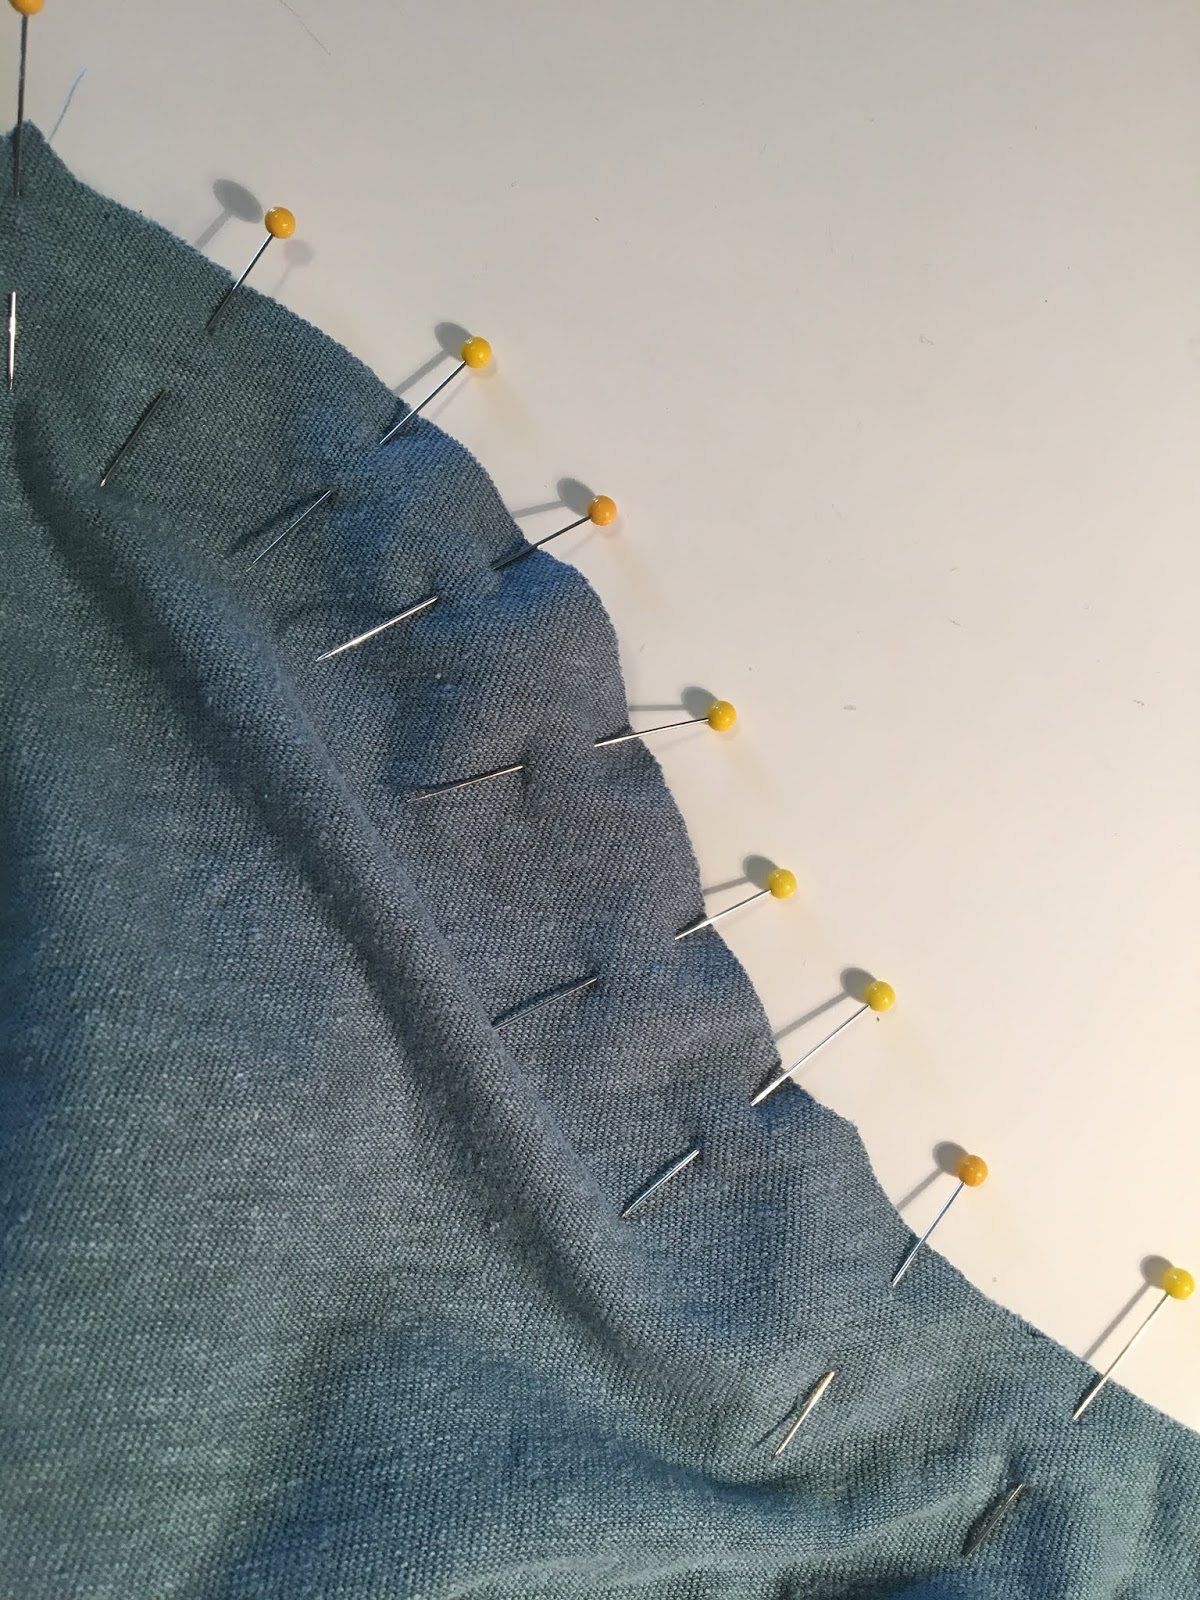


We did stitch the Floreat's neck band on with a standard sewing machine, as it requires a little bit of stretching.  After it's safely sewn on, you can then serge the edge for a neat finish.


Don't you just love the Kylie and the Machine garment labels that are available for your me-mades? We chose the This is the back for this shirt.


Insides as pretty as the outside!


If you don't have a fancy cover stitch machine, just pop in a twin needle for the hemming.

Hint: If you don't happen to have two spools of the exactly same thread for your twin needle, just wind some thread onto a bobbin. Voilá! Matching thread! We use a larger stitch length for this top stitching technique.


Pretty cool!


So, if we want to try the Floreat in a woven fabric, just how different are the construction techniques? You'll find the neckline treatment is the main difference between the knit and woven versions, but the sleeve construction will differ as well.

The knit version has a bias neckband, whereas the woven top has a facing and an opening in the back with a hook & eye for ease of getting it over your head. The woven dress version will have a zipper down the back.


There are so many amazing choices for this versatile top or dress in woven fabrics. Check out our website to shop our linen and linen blends.


Laurel chose to make a woven Floreat, out of some left over metallic linen she had used previously for a dress.  She decided to use the wrong (non-metallic) side of the fabric for a more casual look. 

Facings are usually under-stitched to keep the them in place. It's a simple row of stitching on the very edge of the facing that catches the seam allowance. The facing can also be stitched down if you prefer. And for a closure, all that's needed is a small hook and eye to secure it at the neck.


The second difference between the two fabric versions occurs in sleeve construction. The knit sleeves are sewn to the armhole flat, then the side seams of the garment are sewn up from sleeve hem to the bodice hem. The woven sleeves are constructed separately, then inserted into the armhole, adjusting the ease and matching the notches. After the woven sleeve is set in, you can then finish off the edges with your serger (or a zig-zag stitch).


Laurel did a quickie "pattern hack" on the sleeves of her Floreat, as they did come out a little fuller than she prefers.  She made a small pleat in the edge of the sleeve...very cute.


Double row of top stitching on the hem.


Laurel can't wait to wear this sweet, springy Floreat.


 Whether you choose to use knit or woven fabric, the Floreat is a great beginner to intermediate project. The knit version whips up pretty fast - Laurel made mine in a little over an hour. The woven version is a little more time consuming as the fabric has less "give", so it has to be eased together.

Which version do you like? Why not try one of each! We have some great knits for a soft dress version and the woven version would be awesome in a rayon print. We look forward to seeing your Floreats on the 'gram!


You can read more about constructing both versions of the Floreat on the Megan Nielsen blog!

Sewing is no longer an isolated, individual craft. It has evolved to a shared experience, empowering folks to sew garments that we love. There is such a welcoming, supportive, and inclusive community of creative people to connect with.

Thanks again for reading along! 

Suzan Steinberg
in Berkeley since 1981


Tuesday, June 5, 2018

My Lightweight Jackets for a California Climate

California lives up to the hype of its Mediterranean climate, along with its temperate forests in the North, arid deserts in the interior, and snowy alpine regions in the mountains. We boast beautiful beaches, spectacular cityscapes, and millions of acres of the richest farm land in the world. We call ourselves the Golden State, famous for our golden sunsets, beautiful poppies, and of course, our dry wild grasses that take over the landscape in the summer.

We rarely see a savage winter and for the most part, we don't need heavy wool or down clothing for everyday wear. Unless we are enjoying the ski season in the mountains, our outerwear tends to be lighter in weight. For those of us who call the Bay Area home, we are even more blessed with mild weather for much of the year. We can wear sweaters and jackets all year round instead of the heavy coats so necessary in the Northeast.

I love picking out fabrics that will work in all seasons and with layering. Linen is one of our favorite fabrics for clothing, and with the variety of weights and textures that have become available at Stonemountain & Daughter Fabrics, there are many choices for jackets. Linen is one of the oldest fabrics and is great layered over other fabrics such as ikat, silk, rayon, and more.


Be sure to use the tried and true linen prep recommended by Sandra Betzina before cutting out your pattern.

Tip for Pre-treating Linen
If you want your linen to wrinkle a lot less, do the following: 


  • Before you preshrink, iron the linen with the hottest dry iron possible to set a wrinkle-less finish.
  • Next, throw in a little detergent and wash and dry in the hottest water and hottest dryer you have. 
  • Take out of the dryer when close to bone dry. 
  • You will notice that smaller softer wrinkles have replaced the hard crease sometimes associated with linen.


Before ironing and washing...


After...fabric has soft "wrinkles" so attractive in 
natural fibers and ready for ironing.


Three's a Charm Jacket

Some patterns are timeless. We come back to them time and time again in our wardrobes.  Decades of Style's Three's a Charm Jacket has a cropped silhouette, perfect for our California weather.  We've  previously made it up in our denim & eyelet. This Spring we used beautiful Indian Kantha cloth - it expresses the side of me that loves organic, natural fibers with a handcrafted feel.


So gorgeous in a denim novelty - this pattern can be dressed up or down and is perfect for layering!

The Sapporo Coat

The Sapporo Coat by Papercut Patterns is among our favorite lightweight jackets when made unlined.  We love its simple lines...and of course the pockets!


Kochi Kimono Jacket

Another Papercut Pattern favorite is the Kochi Kimono Jacket. It's a very fast make, even for beginners.  We have chosen Cotton Ikats (shown here), linen (shown below), soft rayons,  wool, and even cotton flannel to make this versatile must-make jacket.


Linen is perfect for the Merchant and Mills Strand Coat...


Pilvi Coat

And if you need just a little more warmth for the colder days, why not try a Pilvi coat by Lotta Jansdotter? We've made this coat several times in 100% boiled wool (really warm if it's lined) as well as unlined versions in boiled wool blends.


The Cocoon Jacket

Transition pieces in the Spring and Fall can be as simple as a sweater knit cardigan.  The Cocoon Jacket by Jalie Patterns is easy to make and super cuddly, for work or play — it just keeps the chill off.


In the end, it's all abut finding patterns that work for you and the weather outside. Many of the indie patterns that we feature in our blogs are versatile and can be made with fabrics that are lightweight, as well as heavier for added warmth. And if you are a more intermediate sewist, many of them can be lined as well.  


Laurel's Kochi Kimono


Laurel and I love our handmade wardrobes and each other!

–––––––––––––––––––––––––––––––––––––––––––––––––––––––––––––––––––––––––––––––

There have been a lot of changes this year. Through the ups and downs and challenges of life, I am so grateful for the people in my life that support me and my store. Lauren and I just got back from a fabulous buying trip to Quilt Market up in Portland where we got to buy all the pretty fabrics and deepen our relationships with all the fun folks in our industry. It's such a profound joy to share this with her and the other members on our team. Through this next generation of fabric lovers, I am finding great hope for the art of sewing garments and for Stonemountain & Daughter Fabrics.


At Quilt Market in Portland with
Lauren and Mr. Domestic!

I have been feeling the shift back to garment sewing for many years, but thanks to these amazing women who work tirelessly to grow our online presence, we now are feeling how much our quality fabric and store is appreciated around the United States and the world. This last month of celebrating our community of indie pattern lovers over on Instagram and Me Made May was so much fun. If you are not on Instagram yet, I urge you to come on over and join the fun. We are all sharing and supporting each other like never before.

Our amazing management team at STM&D from left to right:
Catherine, Lauren, Liz, Me (Suzan), and Olivia
All working on social media, website, and all
the orders coming through daily!
A big shout out to my father and founder of Stonemountain & Daughter as we get closer to Father's Day. I love you Dad and it's been an amazing journey with you. Looking forward to many more years of love and fabric.


Celebrating with you!
Suzan Steinberg
In Berkeley California
I would love to hear from you!


Tuesday, January 30, 2018

Finding Style and Purpose in our Sewing with Merchant and Mills Patterns - The Ensemble


One of our newer pattern lines features a duo of patterns that we believe belong together to form the classic "ensemble": a lightweight coat and a shift-style dress. It's our first crack at Merchant & Mills, a pattern company out of England "with the intention of bringing style and purpose to the overlooked world of sewing". That's a mission that resonates with us at FabricLady and Stonemountain!

The Strand Coat is relaxed and lightweight, featuring unique side seam styling and side pockets.


The Strand Coat Pattern 
"A simple unlined coat for cutting a dash in the city"

"a gentle A-line silhouette"


To complete our total look, "The Camber Set" dress is about as simple of styling that you can ask for...short set-in sleeves with a loose fit that just slips over the head.

Our fabric choice for these two garments is LINEN! Linen has become our favorite year-round choice because it is an excellent fabric for layering. I am really excited about how our linen and cotton ikats will all play together! 

We chose a more "solid" linen for the coat as I thought it would go with more things as an outer layer. The coordinating large striped linen was perfect for the dress. I was a little concerned about the wide stripes, but all my fashionista staffers chimed "Oh heck yeah, you can wear those horizontally!" and I knew it was a good choice. Unfortunately, the blue stripe colorway has been discontinued but we have the equally lovely Burgundy and Forest Stripe.

The Camber Set dress would be an easy make in a solid colored fabric, but the large stripes add to the cutting and sewing time (if indeed you hope to match the stripes in your garment). Frankly, nothing says "bargain" in RTW clothes like a plaid or striped garment that does not at least attempt to match the pattern. And since we want our wardrobe to scream professional, we did our level best to match these formidable stripes.


The Camber Set dress has deep french darts, so right away we have to make a choice where to try to match the stripes on the long side seams.  Wherever you have a bust dart, it is better to work at matching the stripes at the sides from the hemline upward toward the armhole. That is the largest expanse of fabric where unmatched stripes would show the most. We matched our side notches (below the darts) on the front and back pattern pieces.

HINT: To sew the sides together, use your pins lavishly, pinning at every stripe intersection. If your machine isn't kind to pins, then by all means baste the sides together before your final seam is stitched.


If side seams don't quite match at the armholes or the hem, we say it's better to match the stripes on the lower half of the dress and trim away the 1/4" discrepancy.  Remember, nothing is perfect.


The bottom half of my dress to the hemline - Oh snap!!!!


HINT: Wait until you have matched, pinned and sewn your side seams before finishing the seam edges, lest they stretch, making it that much more difficult to match the stripes. Press your seam open, then finish off the edges with a serger or zig-zag stitch.


HINT: According to Laurel, when you're working with a large stripe such as this woven fabric, set in sleeves are a little more of a challenge. Her advice when cutting out the pattern is to match up the bottom of the armhole with the bottom curve of the sleeve as best you can.  The top of the sleeve will rarely match when the two are sewn together, unless of course there is a full moon and the stars are perfectly aligned!

Not perfect, but not bad either...


We love machine hems that don't show!!


Cute little bias neckline in the front and a yoke in the back...


Onward to the coat! The Strand Coat is relatively straightforward in its instructions, just like the Camber Set dress. And since we don't have any stripes or pattern to worry about, it goes together rather quickly. At first glance, the two-pieced back looked very large, but we then remembered that The Strand features side seams that are brought toward the front.


Loving how the back of the Strand coat hangs and fits!


HINT: Interfacing at the pockets is vital if you don't want your coat to sag and lose its shape, since it is unlined. Our fabric is loosely woven, just like the dress fabric.


Two in-seam pockets in this coat!!!


We were sailing along smoothly until it was time to attach the front and neck facings to the coat front.  This process is relatively simple...unless of course it includes some inseam hooks and eyes for the front closure. The purpose of putting the closures hidden within the seams is just that...the bulk of the hook and the eye is hidden in the folds of the fabric, between the facing and the front fabric. You don't see any of the hand sewing. The front is designed to just meet together and the metal hooks don't show.

Sometimes, the brain just overloads...we know what it's SUPPOSED to look like when we're done...BUT.


Just follow the instructions (or just imitate the the drawing in the pattern) ...and trust that it will work. However, here's the thing about sewing on hooks and eyes: it takes time. We used some oversized coat hook and eye pairs.


Looks like they are going to line up...


HINT: The next step is even more time consuming...when you sew on the front facings, you must leave leave little gaps where each hook and eye is placed and then finish off by hand. The whole process took Laurel almost two hours (very "fiddly", she says) Truthfully, it's not really a coat for beginner sewists, despite its simple lines. Of course you probably could do an easy pattern "hack", and just leave off those hidden closures.


In the end, the Strand Coat is a very loose fitting coat.  We made a size 12 which matched up with my measurements, but it does look large through the shoulders. The picture on the pattern envelope also looks like it drapes off the shoulders, so maybe we're okay. 


I might want to roll up the sleeves...


The whole notion of making a coordinating coat and a dress harkens back to an earlier fashion time to me. And though we rarely wear such an "ensemble" (especially at Stonemountain), both of these patterns will look great as separates–paired with leggings, boots or jeans–befitting my laid back style. That being said, this coat would be really beautiful in silk shantung, boiled wool, velvet or even a shiny brocade for a fancy night in the city. That's the beauty of making your own wardrobe...you get to pick what you wear, when and where you wear it! Many of you are also working in the corporate world and these patterns might be perfect for you!

All together it gets a thumbs up! 


2018 is off to an amazing start! Never before have we had so much opportunity to make clothes that matter. So much has been opening up for me personally with respect to my fabric store and the potential for greater impact and leadership. Stay tuned for an upcoming blog series that I am excited to share.

Thank you for joining me, Laurel, and all of us at Stonemountain & Daughter Fabrics, in this co-creative worldwide movement of sewing clothes that not only feel good to wear, but make an impact as well.

Join us in sharing your #memade garments! We love seeing everyone's creations on Instagram through @fabriclady3 and @stonemountainfabric. This is where we can truly inspire and catalyze each other to show up and step toward our life's potential!

We are not alone! Together we are making a huge difference.
–Suzan

FabricLady and Laurel, collaboration, joy, and so much creation!
I am wearing the Strand and the Tea House Top and Laurel is wearing the Pilvi Coat!

GREAT TIP from Sandra Betzina! If you want your linen to wrinkle a lot less, do the following: Before you prewash your linen, iron the linen with the hottest, dry iron possible. This will set a wrinkle-less finish, which is already on the fabric. Next, wash and dry your linen in the hottest water and hottest dryer you have. Take out of the dryer when close to bone dry. You will notice that smaller softer wrinkles have replaced the hard crease usually associated with the fabric. Repeating this process will lessen the amount of wrinkles over time.