Tuesday, July 25, 2017

Raglan vs. Dolman vs. Set-In: Sleeves for Everyone

Knit garments are another factor in our garment sewing revolution and renaissance. The quality of knit fabric and the amazing new patterns by our featured Indie Pattern Companies are fueling our quest for Me Made garments! Tee shirts have become an important part of every Me Made wardrobe. With all the high quality knit fabric we have, now we can make our own custom garments using the many new patterns from women-run Indie Pattern designers around the world. Knit fabric can be made of cottonrayon, and specialty fibers - all perfect for your next project!

A lot of experienced sewists sort of hit the brick wall when we come to the sleeves of a top, especially if they are the traditional set-in sleeve and even more so if the fabric is woven with little give.  Let's face it, putting in a sleeve takes patience and care, lots of pinning and sometimes even basting.


We've showed you in past posts of one of our favorite summer tees, the Lark Tee by Grainline Studios. This knit tee's set-in sleeves don't require a lot of easing at the shoulders and in the armhole, so as set-in sleeves go, they're pretty straight forward.


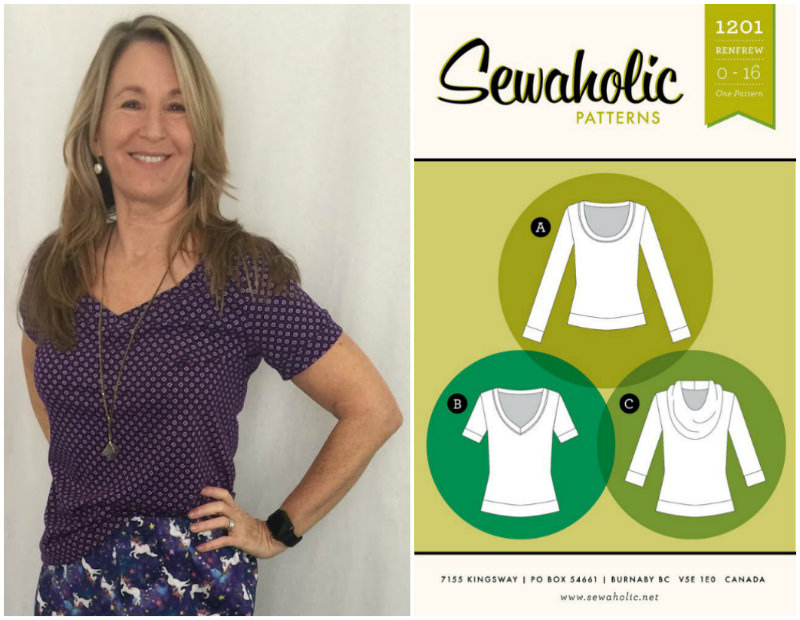
Sewaholic's Renfrew tee has set-in sleeves as well.  They, like the Lark Tee pattern don't require a lot of easing at the shoulder and in the armhole, mainly because they are both designed for knit fabrics.


But if you remain intimidated by the set-in sleeeve, why not try a tee pattern with a raglan or dolman style sleeve?  Jalie patterns have both of these styles and working the sleeve areas is pretty easy in both patterns.

Jalie's T-shirt Raglan (#3245) is a "baseball tee", especially if you use two different colors - one for the sleeves and neck binding, and another color for the body of the shirt.


We chose to make our tee using the same fabric for the entire shirt, mainly because we fell in love with this cotton and lycra celestial print. The sleeves are 3/4 length, perfect for a cooler summer evening. Raglan sleeves are attached to the bodice by sewing from the neck down through the bottom of the armhole in both the front and back.  After the bias binding is attached around the neckline, the sleeve seams are sewn together with the sides of the top, all in one piece.


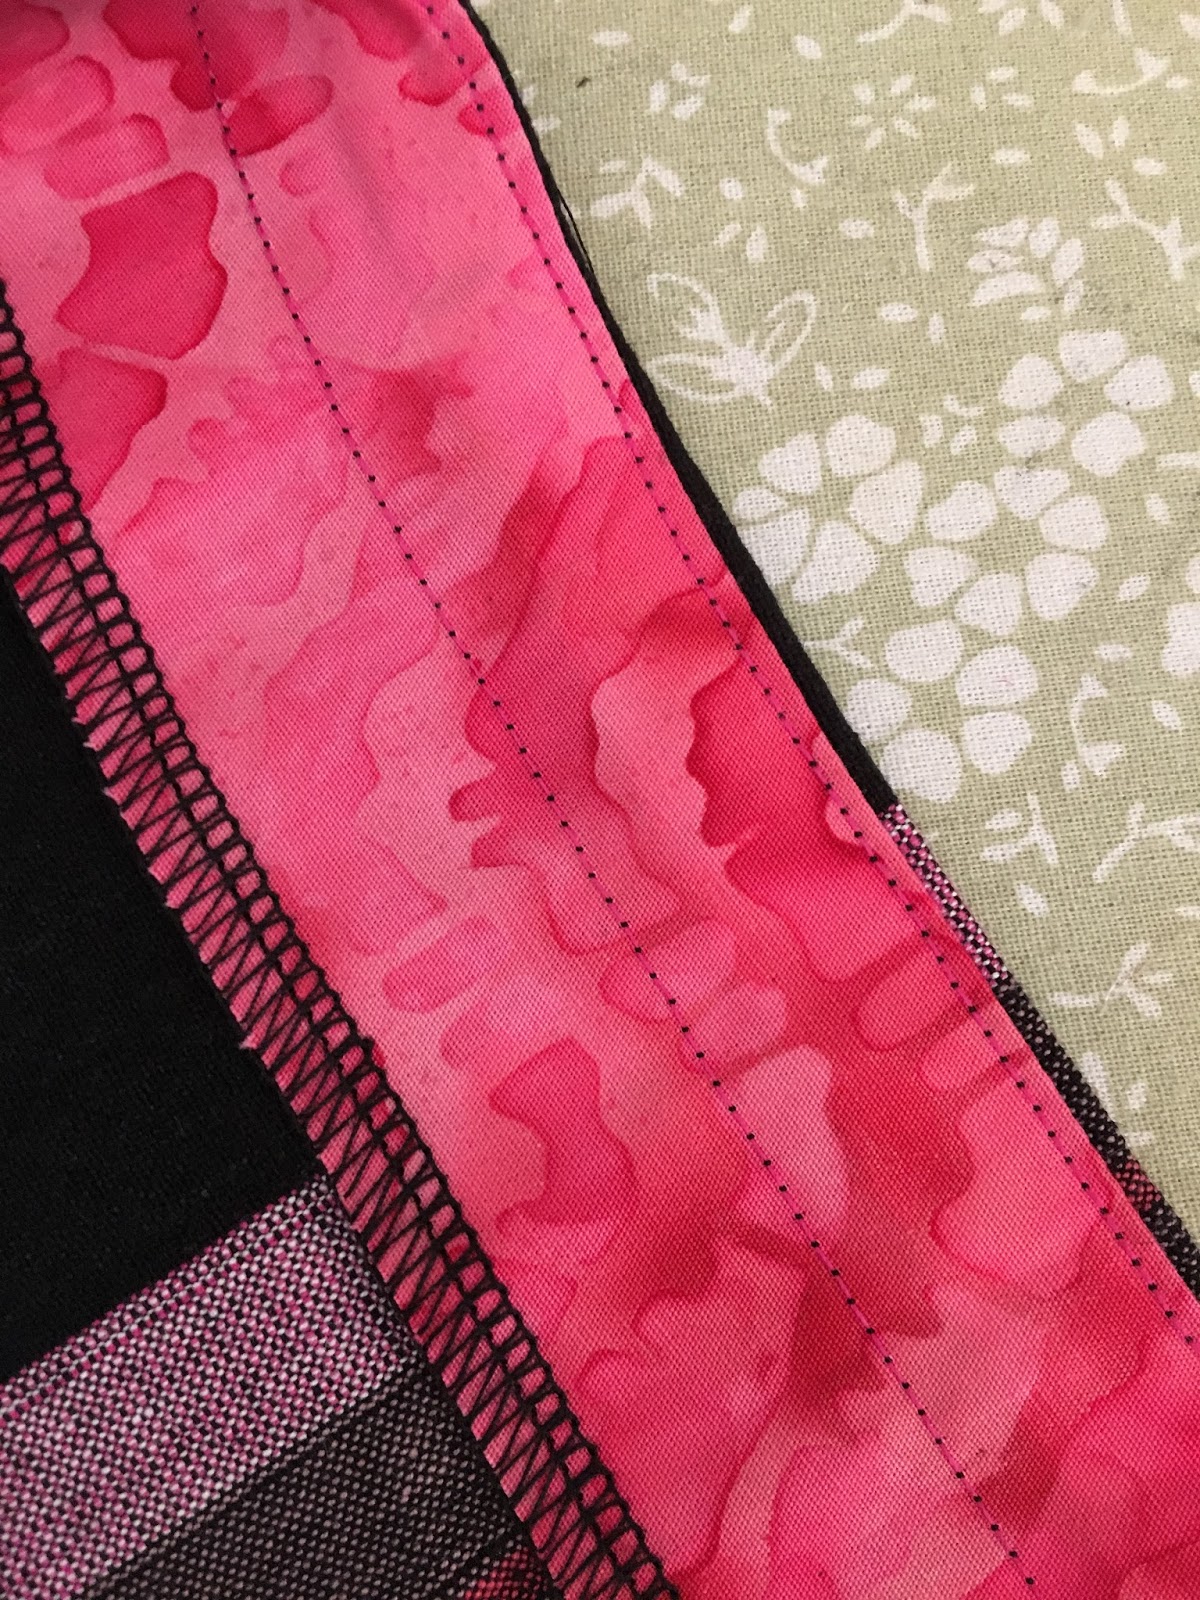
Laurel's been playing with her machine's twin needle, so the the stitching around the neckline is very professional looking.  She used the same technique to hem both the sleeves and the bottom. Don't you just love this heavenly cotton/lycra knit? We still have some if you are interested or take a look at the other print options up on our Stonemountain & Daughter website.


One of our newer patterns from Closet Case Patterns is the Ebony T-Shirt pattern, which also features a raglan sleeve.  This top can be super easy to make, depending on the knit you choose - cotton knits would be a snap.


Wearing my Ebony tee in a reversible rayon knit with Heather Lou, the designer and owner of Closet Case Patterns! We just got more in of this reversible rayon knit with the dots and stripes - it's the perfect top!
Laurel and both loved this adorable rayon knit in a cactus pattern - I made a Briar Tee from Megan Nielsen and Laurel chose the Ebony.

HOT TIP:
Raglan sleeves are not difficult in the slippery knit, but we chose to beef up the sleeve hemline with a Design Plus Stay Tape. Lighter knits tend to roll at the edges and the stay tape make it easier to hem this really stretchy knit. (We also used this on the Briar sleeves and hemline - this stuff is magic!) This is a must have for your sewing tool kit!


After applying the tape, Laurel serged right over the top of it, but you don't have to - just hem!
      

Remarkably similar, these two tops.  Laurel's Ebony (raglan sleeve) is on the left and my Briar (set-in sleeve) is on the right.


The Dolman sleeve is even easier to whip up. as the sleeve is just part of the bodice - no seams at all. Jalie's Dolman Tops pattern (#3352) and be made with 3/4 length sleeves or simply short!


The short sleeve version of this top only requires one yard of 60" knit fabric, so it's a great stash buster and a very quick make. Since I'm on a roll with celestial themed knits, I chose this black and white cotton and lycra knit. What a breeze to make!


There's that even stitching again.  Love that twin needle. Hint: Use wooly nylon in the bobbin!
The Jalie Dolman Tee shirt pattern has a longer curved hemline in the back.


Laurel's raided her stash for this cotton knit from several years ago...nice Dolman!
And of course if you really want to challenge yourself, try a fancy set-in sleeve in a woven pattern.  Here's a little sneak peak at the Dove sleeve, from Megan Nielsen patterns.


We have dubbed this the "Summer of Love", so why not a silky rayon tie-dye print? We were inspired after attending the Hippie Modernism exhibit at BAMPFA her in Berkeley. Many of the photos and exhibits took us right back to the 60's, even though a couple of us were seeing reminders of this era for the first time.


What we loved most about this exhibit is the reminder of how important sisterhood is...sharing lives, dreams, and hopes for the future over lunch, laughing at some of the get-ups that the "flower children" wore, and just being together for an afternoon in sisterhood is what we all crave.

Let's all come together for our Sewing Summer of Love at Stonemountain - Join our challenge and community and share what you are creating. "Fabric really brings us together, and sewing gives us a chance to slow down, take a breath, and create something with our own two hands.  With social media, we now have the opportunity to connect with other sewists around the world.  We may not all be converging on Haight and Ashbury, but we can come together this summer to celebrate creativity, community, and of course, love!"


Peace, Sisters.

Wishing you health, joy and great fabric you can feel good sewing!

SuZan Steinberg
Owner, Stonemountain & Daughter Fabrics
Downtown Berkeley California

Buy Local! Buy Berkeley!

Friday, July 14, 2017

From Disaster to Awesome! Lottie Dress with Tip for Wrinkle-Less Linen!

We have been enjoying a renaissance in sewing garments that I haven't seen since the 1980's! What is the reason behind this sewing boom? Amazing quality fabrics, notions, and drum roll please....Independent Patterns! Here we are seeing the strength of women creating patterns for women's bodies! Back in the day of the main pattern companies, many sewists were driven mad by the instructions and lack of fitting that was just taken for granted. But every now and then something odd happens even with a tried a true indie pattern...read on!

Every active sewing studio has a drawer, tub, or basket full of unfinished items - garments in which we reached roadblocks, garments that didn't seem to fit right, garments that were bigger than our skill level, or stuff we just simply didn't like after all. It seemed like a good idea when we purchased that fabric, but with the passage of time, not so much. These containers full of half finished garments may lie in the recesses of a dark closet, under the bed, or tucked away in a cabinet just waiting for us to revive them into completion.

Such was the Lottie Dress made out of Stonemountain Linen started sometime LAST summer. Yep, such is the way of sewing!


The soft linen fabric we chose had a nice hand, so it wasn't that the fabric was wrong. It's just that IT WAS HUGE.  It just hung on me...very "schmatta" looking (Yiddish for rag), so nothing but a major overhaul would make it wearable.


Laurel looks confounded...
I look horrified...


After four years of working together, I know for a fact that Laurel HATES alterations.  And to say that this sack needed to be "altered" is like saying "Bill Gates is financially secure". So naturally this little gem languished in a basket while Laurel thought of every excuse not to fix it.

Laurel is currently doing a renovation on her studio, so she's into checking things off her to-do list before she dismantles the whole room.  This dress got put on the short list - lucky me! Alterations included removing the neck facing and taking inches off the shoulders and side seams.  We also cut almost 9 inches from the length and reshaped the armholes.  Instead of facing the armholes and neck edges, Laurel used self-bias strips made from one of our remnants.  The result is a neat and tidy edge with a little pizzazz.


So much better...


Well, Zannikan looks fabulous in the re-worked dress, so perhaps it will look equally well on me.


I'm so glad that Laurel didn't give up on my Lottie Dress, by Christine Haynes.  It's very tempting to just toss projects like this in the donation bag for some other ambitious sewist to tackle. However, when you see something challenging through to the very end, there is nothing more satisfying. In the end, it doesn't really matter how long it takes, it's enough that you finished.


Thanks for joining with me and creating your own clothes!

You are all invited to stop by my awesome store, Stonemountain & Daughter Fabrics in Berkeley
this weekend to see this dress on display,
along with many of the garments featured in my blog!

Creatively yours,
SuZan

Are you on Instagram? If so, please follow both Fabriclady3 and Stonemountainfabric for the more current photos and inspiring ideas.

Also, are you receiving the email newsletter from Stonemountain & Daughter Fabrics? We have so much great info and coupons for all your purchases!

GREAT TIP from Sandra Betzina! If you want your linen to wrinkle a lot less, do the following: Before you prewash your linen, iron the linen with the hottest, dry iron possible. This will set a wrinkle-less finish, which is already on the fabric. Next, wash and dry your linen in the hottest water and hottest dryer you have. Take out of the dryer when close to bone dry. You will notice that smaller softer wrinkles have replaced the hard crease usually associated with the fabric. Repeating this process will lessen the amount of wrinkles over time. 


Monday, July 3, 2017

"That was easy!" Perfect for Summer Sewing!

Suzan with Heather of Closet Case Patterns!

With summer in full swing, it's so much fun to go to our closet and find easy flowing clothes. It's also the time where we dream about sewing something we might have seen would feel great to wear. I hope that my blog has inspired you to try some easy indie patterns and begin to create your own #memade wardrobe!

As you know, we are sponsoring a challenge through my fabric store, Stonemountain & Daughter in Berkeley. It's our #sewingsummeroflove challenge! Read more over at the store blog!

In these days of two-earner households, our time away from work is precious. And even if we're not working outside the home, there's plenty of busyness to fill our days. If and when we have some spare time for ourselves to read, watch a flick, bake, create or craft, we'd like to be able to actually finish something in a sitting. I love seeing our Facebook and Instagram friends managing families, juggling chores and still finding the time to sew. Some of us have precious little time to devote to ourselves and our hobbies.

If sewing is your thing (and we're assuming it is since you're following our blogs here at Stonemountain & Daughter Fabrics and FabricLady) you love to find styles and patterns that don't take weeks and a bottle of Aspirin just to get through it. Taking your time with complex patterns and that luxury fabric that emptied your pocketbook can be very satisfying, but most of the time we just want to be able to make it quick, and we want it "Easy" and to fit!
We have two such makes for you...tops that you can make in 2 to 3 hours, depending on how accomplished you are as a sewist.  Laurel has been sewing forever and she's is pretty fast, so these were an afternoon respite in her busy day (who we kidding, she's retired!). Nevertheless, even a beginner sewist can tackle these in a fair amount of time.

Closet Case's Ebony knit top is uber easy, especially if you have a serger. The raglan sleeved version is the easier of the two versions, since there are no set in sleeves.


We chose a soft double knit with polka dots on one side and the back featured stripes. You could use either side as the outside, but we chose the polka dots for the body and the stripey side for the sleeves and the neckband.

We attached the neckband (just a double folded strip cut on the bias) by sewing it with the machine, then serging the edges and finished it off with top stitching.  Knits are so forgiving when using this technique, because you can "ease" the binding into the bodice - the band is always smaller that the neck opening, so you sort of stretch as you go.


Like all sewists who love their machines, Laurel is dreaming of getting a cover stitch machine...but alas, a simple top stitching line works just as well. For the hem on a knit fabric, she uses a multi-stitch zig-zag setting like the kind you might use on elastic.


Way Cute! Elapsed time (not counting the cutting out) one hour!!!!


The second quick and easy top is from 100 Acts of Sewing, aptly named Shirt No. 1.


We chose a woven cotton ikat with a decorative stripe running the length of the fabric. You could run this simple pattern so that the stripes go sideways, but we chose to make them up and down. 

The original directions of Sonya's design call for using a bias tape facing, and the directions on the pattern are good. But Laurel is a self-facing kind of a girl, which does take a little more time. And besides that, she has a thing for facings in different fabrics. Hint: Fat Quarters are great for creating both facings and bias strips, so let your finishes show off your personality! Our cotton Batik fabrics are perfect for facings and trims!

If the pattern doesn't include a neck or armhole facing you can make it yourself using tracing paper.  Just lay the bodice on the paper and trace around the neckline and shoulders.  Remove the pattern and cut the facing to whatever width you like, following the curve of the neckline.  This illustration shows a neckline and armhole facing in one piece (for Dress No.1).


Attach the facing to the neckline...Clip, clip, clip those curves..


Don't forget to under-stitch the facing, it will help it lie flatter...


When you press it, a tiny edge of the fabric rolls to the inside...


Top stitch the facing down - we used pink thread in the bobbin.


The side seams go directly up into the curve of the sleeves, so you will need to clip the underarm curve.


If you plan to serge the seams, then pull the curve of the underarm out straight as you serge, right through the clipped edge.  This allows the sleeve to have some give in the seam and will hang better under the arms.


This top is going to be great with jeans, don't you think? Hmmm, I wonder what it would look like layered over a Dress No. 1?


Even with the self facing, it still only took a little over an hour to complete. Make it this afternoon and wear it tonight! There are so many great cottons, ikats, double gauzes, chambrays,  rayons and even silks (if you want really special!) that this easy pattern would make sing!


Laurel's - another Ikat color way

There's something very gratifying about a quick make. Either of these two easy patterns - one knit, one woven - could be made during a baby's two hour nap, sitting out a horrid action movie, or just a "I'm going to take time for me!" break. Some say that sewing can be cathartic, but we think you have to pick something that will fit into your skill wheelhouse, to avoid hair pulling and gnashing of teeth.

The important thing is to take time for yourself, whatever that may be. 

If it's enjoying nature and yummy tropical fruit, great!


Or just being with long time friends, so much the sweeter!


Or finding your tribe of sewing enthusiasts to create community with!


If it's sewing, so much the better.  

Keep on Sewing! It's the #sewingsummeroflove
SuZan