Tuesday, December 15, 2015

The Cabin Top

Blueprints for Sewing patterns are simple, flattering, comfortable, and classic with an artistic edge. They emphasize functionality and simplicity and feature thoughtful embellishments and adaptable cuts. Each pattern takes its inspiration from an architectural style.

The Cabin Top takes its inspiration from the simplicity of a cabin - a humble structure, built to provide shelter from the elements.  Spending time in a cabin "allows the mind to wander," says pattern maker, Taylor.  Thus, the Cabin top is a simple and functional top that will allow you to make it uniquely your own through fabric choice.

The Cabin is a basic, flattering shape, enhanced with French darts and a box pleat in the back. The neckline, sleeves, and hemline are finished with bias tape, either out of a package or self made.


I chose a vibrant black and white geometric rayon challis print to work up in this pattern, as an active print goes well with this simple design.  Laurel used basic single fold bias tape to finish the edges, turning it completely to the under side so it does not show (as opposed to binding the edges with bias that will show, like for contrast). The pattern calls for the bias tape to act as a binding around the neckline, sleeves and hemline, so the black binding would show through this tow colored print.  Because this fabric was so "silky", we opted to make it more dressy by using the tape like a facing to hold the shape of the neckline.


The back features a narrow yoke at the shoulders. We cut the yoke on the fabric's crossgrain to give greater interest to the back of this top and show off its seams.  The box pleat in the back is secured with a tiny stitched triangle. 


French darts create a beautiful semi-fitted slim silhouette.


Just to show you how you can make this simple style your very own, let's look at Laurel's version of the Cabin Top. She chose three fabrics, all in rayon. She made her own bias tape and chose to use it as a binding to help "ground" the business of the two other fabric choices and yet contrasting so that the overall artistically look she is going for is achieved. She also added some design elements just to have all the fabrics play off each other.

A triangle of contrasting fabric  int he front, mimicking the back, and the cutest buttons... 
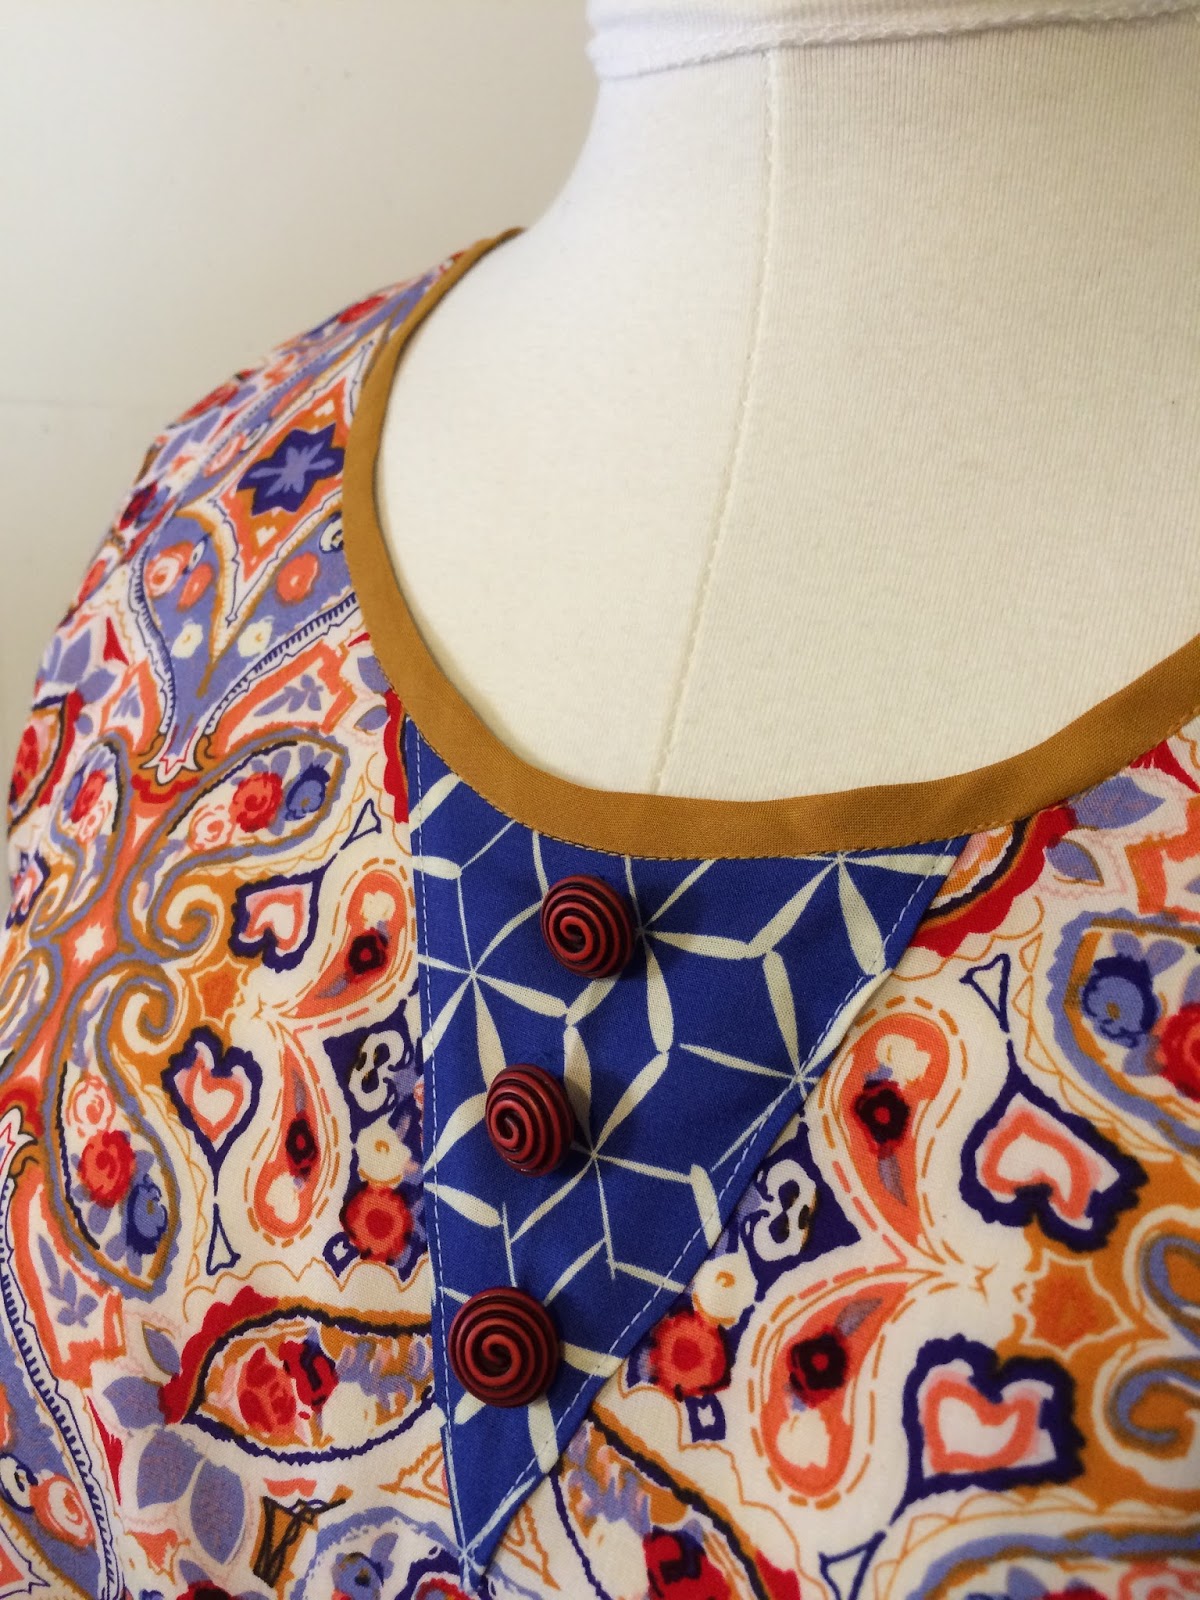

...the small triangle of fabric in the back in the contrasting print...
  

....makes for a uniquely artistic Cabin Top!

We can also see this top in a color block of solid fabrics  The solid colors would really highlight the pattern's design. So many possibilities!

Colette and Zanikan hanging out in the sewing studio. 


Creatively yours,
Suzan

Wednesday, December 2, 2015

Too Early for a Red Holiday Dress? Never!

Every fitting and planning day at Stonemountain with Laurel and our staff, there is a frenzy of fabric bolts being brought to the cutting table for my consideration for the FabricLady's wardrobe. I have been known to get into my comfortable design aesthetic:  similar pattern choices and familiar fabric colors and textures. That's why it's so great to have input from people who may see you differently than the image and perceptions that you hold about yourself and your personal style.

Me (in front of the mirror): "But I never wear red."

Them: "But look in the mirror. See? You can wear this color!"

Me: "Mmmm...I don't know...."

Them: "Come on Zan...a cute little red dress?  Everybody looks good in that!!"


I succumbed to the persuasion.  After all, I consider my staff to be rather fashion forward, so if they say I look good in red, I'm all in. And frankly with the holidays approaching, perhaps I could use a "little red dress?"  The fabric they chose for me is a soft lightweight ponte knit and the pattern, Sewaholic Patterns' "Davie" (#1503).


The dress features princess seams, a keyhole front and cap sleeves - and no zipper! It's not a difficult dress to make at all, but it takes time to do all the top stitching of the seams.  You could eliminate that step, but we think that's what makes the Davie dress special. This is a dress that you could make in one day (start in the morning and be party-ready by 5:00). It took Laurel about 4-5 hours to complete.

We also wanted to use a jersey bias tape for the neckline and sleeves.  We love this finish, but the best laid plans don't always work out. Laurel used a stretch stitch on this ponte knit and the first application of the bias tape didn't pass muster - totally wonky and uneven! Stretch stitching is excruciating to rip out, so she ended up cutting off the entire neckline and attached bias tape (we love that she's not afraid to admit mistakes!) The second attempt was better.


Don't forget that when you're using a stretch stitch on your knits, the top stitching should have some give to it as well.  Laurel adjusted the stretch stitch on her machine ever so slightly for the top stitching. (Don't you love that little keyhole at the neckline?)


Because of the misstep, there was not enough of the jersey tape to finish off the armholes. Necessity is the mother of invention, and so why not just make a traditional facing?  On cap sleeve armholes, the curve can be pretty severe and a self-made bias strip out of a ponte knit can get unwieldy on the curves.

Making a facing using the dress pattern is pretty easy:

1) Before you sew the side seams up, lay the open dress on top of two layers of fabric, making sure all the wrinkles are smoothed out.


Cut around the armhole/cap sleeve. Remove the dress from the two layers of fabric beneath.

2) Mark the facing at about 2 inches in width, and then cut the facing out.


3.)  Serge the edge of the facing and then join the right sides together and sew up the facing at the side seams. Sew up the side seams of your dress and then apply the finished facing to the dress, right sides together.


Trimming the facing helps remove bulk...and don't forget to clip your curves!

5) When you add a facing to a garment, it's always a good idea to "understitch" along the top edge of the facing - this will help the facing lie flat.


6.)  Once you have completed the row of understitching, turn your facing to the inside and secure it to the bodice.  Because Sewaholic's Davie features top stitching, Laurel top-stitched the facing down, just as she had done with the neckline bias tape.

When top stitching along a curve, be sure to let your fabric flow under the feed dogs, keeping the curve in tact.  You will need to slow down if you want it to be even! Laurel will often use the edge of the presser foot itself as her guide for the row of top stitching.


Three or four bobbins later (a lot of top stitching!), the dress is finished.


The Davie is short, so I'm thinking some great black tights.  And if I want to wear it at work - Boots!
On fitting day, I just happened to be wearing both.


We noticed the armholes were a little big - a recurring problem for me.  Note to self - adjust the shoulders to raise the armholes next time.  But since it's a little late for that, we decided to just doing some ripping and repair...ugh (Laurel's favorite thing!!).


Looks so adorable with this black stretch denim Grainline Studio's Morris jacket. I guess I'm becoming a believer in that "everybody can wear red!"


Thank you all for joining me on this adventure - it's not just about sewing clothes, but inspiring each other with our creations. I love hearing from you when you share about your projects and even better when you wear them into the store!

We are so lucky to have so many indie pattern lines to explore and choose from. For us at Stonemountain & Daughter, this is the future. All of the bigger pattern lines now sell directly and discount to the consumers…are Fabric Stores a thing of the past? 

There are many new questions facing the indie Fabric Store as we look to the future. If you are interested, perhaps I will share more of my thoughts as we navigate all these changes while staying in business! 

We love our sanctuary here in Berkeley and hope that you continue to support us and all the indie fabric stores that are left.

Happy Sewing,
Suzan


Monday, November 30, 2015

Bias Tape Heaven - A Clean and Polished Neckline Worthy of a Pro!

Many of the tops and dresses today suggest using commercial bias tape or fabric bias strips to finish off the neckline or armholes. There are many different ready-made bias tapes to choose from, though typically beginning sewists go right for the Wrights display in the fabric store. This hands-down favorite is very convenient and comes in a variety of colors, but it doesn't always work for sheer and soft fabrics or some knits.


As we advance in our sewing skills, we look for other alternatives. Cutting your own bias strips sometimes requires purchasing extra fabric and they can be tricky to get uniform.


We found a great sheer stretch "ribbon" by Renaissance Ribbons to try on our Burda Tee 7645, which we are working up in a creamy off-white ponte knit.  (Cutting bias strips of this knit would probably be too bulky when sewed to the neckline of the top.)


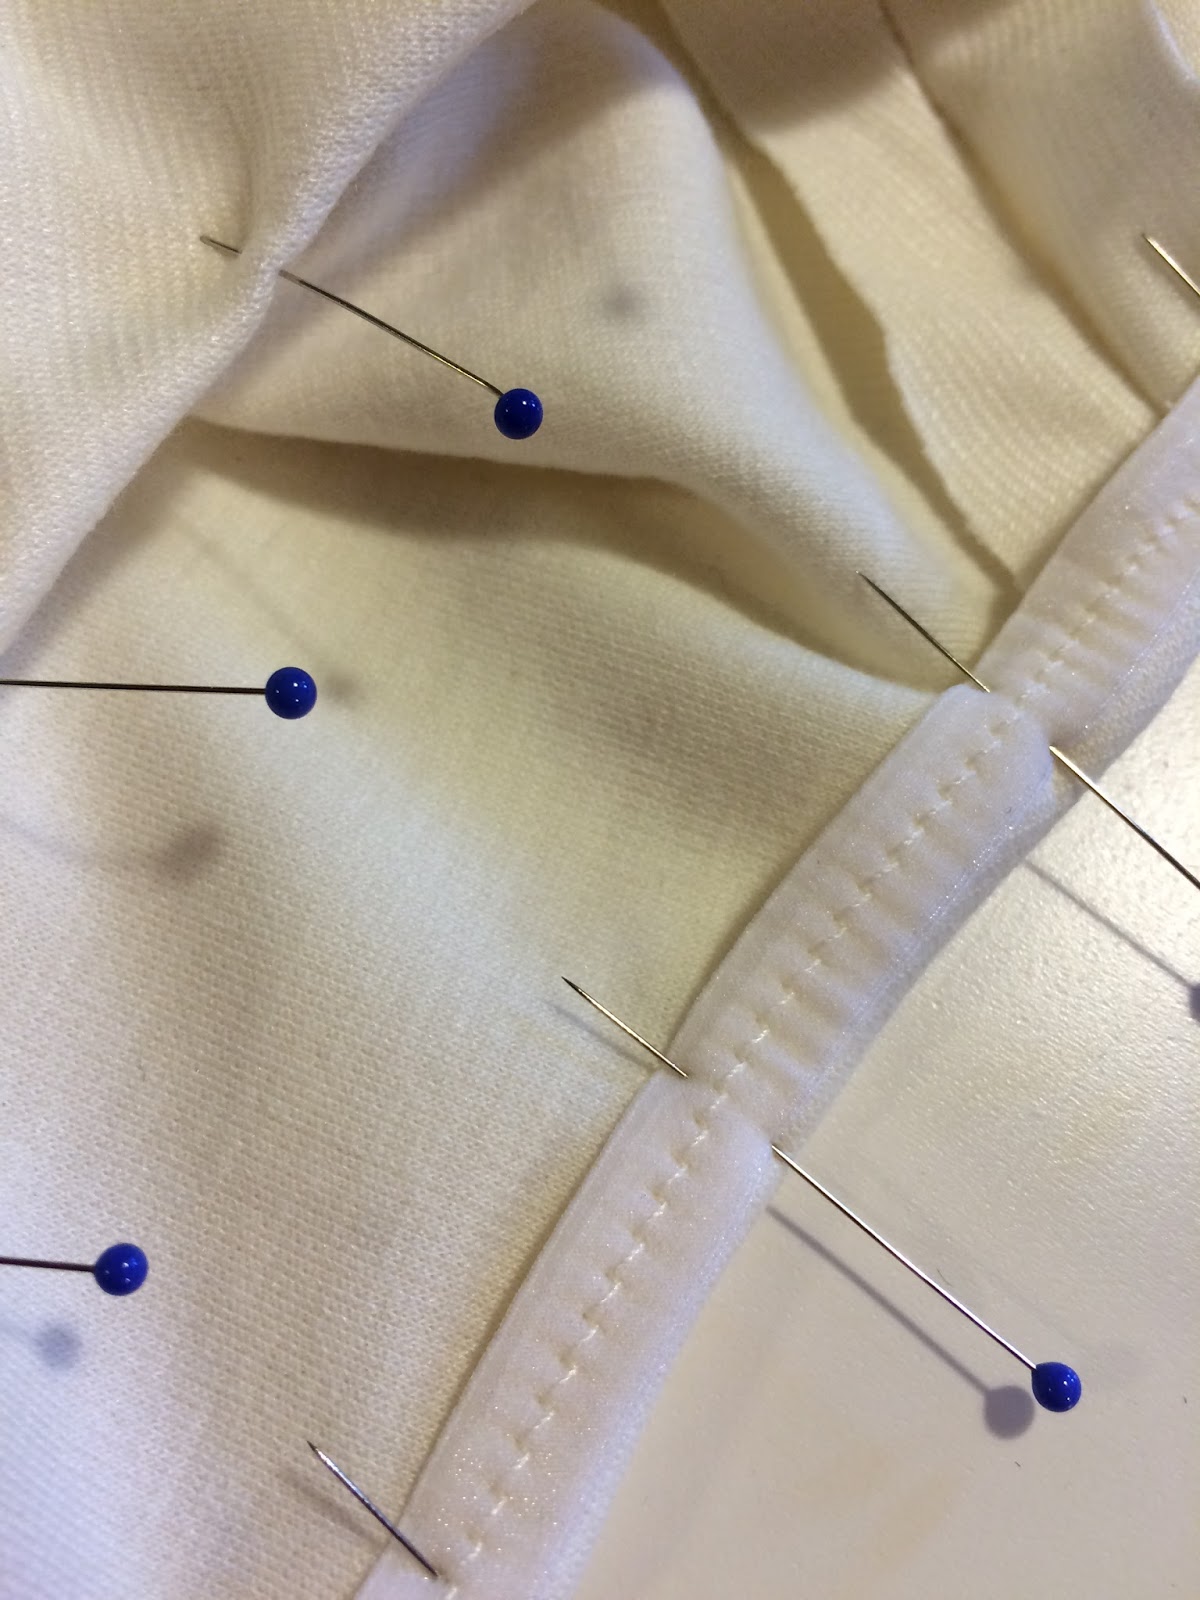
The ribbon is applied to the very edge of the neckline and sewn in place. Super easy!


Once the ribbon is sewn on the neckline, a quick turn under and 
some top stitching makes this tee-shirt neckline clean and polished.


We used the same ribbon on the armholes.  The results are a finished neckline worthy of a Pro!


What a year it's been for sewists and fabric lovers! I hope you have enjoyed seeing all the garments we are inspired to create here for my blog. Many of the garments are up in the store for you to see.

Please stop by when you can and see what's new in patterns and fabric!

Our classes are up on our website also if you wish to advance your skills or finally get sewing again!

Are you receiving our email newsletter from Stonemountain & Daughter Fabrics? If you wish to, please sign up on this link to receive them. We send them out every 3 weeks, and they have discount coupons!

Happy Sewing!
Suzan

Future blog: Mytle Dress by Colette and Morris Blazer by Grainline!

Tuesday, November 3, 2015

A Dahlia for Fall


We are in one of our most favorite sewing/creating seasons: 
Fall!


I'm not sure if it's the warm colors or the rich fabrics or the pattern detailing that makes fall fashion designs so appealing, but we love being part of the fabric industry this time of year. Fabric colors and textures of fall seem to pull from the natural world than at any other time of year - everyone wants to embrace the earthiness of a rich brown wool, the coziness of a warm red plaid flannel, or the comfort of a soft dark green ponte knit.

I love the ease of wearing dresses for work, adding boots and leggings to them for the fall weather. I find I prefer dresses because they are uncluttered, less hassle, and more comfortable than a two piece outfit.  Our independent designers shine in the dress design arena, so I enjoy featuring their unique dress designs in my work wardrobe.

Colette has added to her easy yet visually interesting designs with the Dahlia dress. We love the detailing at the waist.


We chose a soft, but large scale plaid for the Dahlia...perfect for my fall season mood.  Be sure to check out the other colors this "Peppered Plaid" comes in!


Peppered Plaid - 100% Cotton Loveliness!

Whenever you are working with fabric where matching is crucial, like this large plaid, be sure to IRON/PRESS the fabric before you start your pattern layout.  Many cotton blends have wrinkles and creases caused by shipping and storage of the bolts that are easily steamed out.  


The Dahlia has a seamless center back and front with a narrow-at-the-waist fit, which means - you guessed it - the dreaded side zipper. To make it more exciting, Colette's instructions call for an invisible zipper.

In order to make this tricky installation process a little easier, Laurel changed up the order in which she assembled the dress. Instead of putting in the zipper after the side seams were sewn under the arm and in the skirt, she assembled the front and back sections but did not sew them together at the side seams, leaving her the freedom to perfectly match the two sides of the zipper, without having to fight/re-do/seam-rip/cry over the side "opening."


Looks good, doesn't it?  Laurel did a fantastic job pattern matching on this dress, and I can't wait to wear it again!  It even looks good with leggings underneath, which is perfect for work when it cools down a bit.


With a great quality cotton, Laurel's workmanship, and Colette's great pattern, this dress is a winner!

What are your fall sewing plans?

Creatively yours,
SuZan 

Wednesday, October 14, 2015

Creativity To The Rescue!

Finding a fabric that you loved in the store but you get it home, begin your project and then think, "Really?!" can be soul crushing for those of us who *bleed* fabric. Before you toss that fabric into the scrap pile, re-think how you might change your original design idea to rekindle your "loving' feeling" for the offending fabric.

Grainline's "Tiny Pocket Tank" got us all excited by its simplicity and semi-fitted versatile shape. At our last wardrobe planning session, we picked out a soft ikat in a rich olive color to make another pair of Sewing Workshop's "Hudson" pants.


My monthly wardrobe planning process is a collaborative effort - together with a couple of my creative staff members and Laurel, my seamstress, we work together to pick fabrics and patterns that best express our collective design aesthetic. Working towards a common goal of creating inspiring wardrobe pieces that I would wear, we manage to create garments that we all love.

To pair with the olive ikat pants, we found a soft off-white double gauze for the tank to best coordinate with he pants and yet stand out on its own as a visually interesting piece.


Double gauze is, very simply, two layers of very soft gauze that are tacked together with little stitches that are somewhat invisible. I have previously featured on this blog the double gauze plaid in my Liverpool Shirt.

After pre-washing her fabric, Laurel took a closer look on the cutting table and found that the color of the gauze was not the nice off-white that we thought we saw in the store, but in fact, a greenish-grayish off-white, resembling something akin to a drab dish towel or putty. Try take your fabrics to the store window's natural light to make sure of your color choice, keeping aware of the time of day as morning light can be more yellow and afternoon light can look blue. Suffice it to say, the idea of a drab colored tank top not sound appealing to me or my seamstress. What were we thinking?!

Solution: Be creative and shift gears!

Laurel came up with the idea of incorporating the olive ikat fabric into the top.  She also thought the gauze fabric might be better suited to something like the Scout Tee, thus adding sleeves to soften the overall look.


The Scout Tee uses a bias strip for the neck binding. Laurel cut bias strips of the ikat design - even though the design wasn't on the true 45 degree angle of this fabric, it would still have enough of the stretchiness of a true bias (this was done since ikat does not have a symmetrical or regularly distanced pattern like printed fabric, so it looked better to keep the fabric design symmetrical).


And since we loved the tiny pocket on the original Grainline Studio pattern, we added our own tiny pocket, also made in the ikat. With our creativity now flowing, maybe we need to add a cute button detail!


Laurel cut sleeves out of both fabrics, but ultimately decided to use the ikat.  The resulting design changes and addition of the contrasting ikat changed the whole vibe of the cotton gauze from dirty T-shirt to casual color-blocked fabulous.  It looked like we planned it that way from the beginning!


I'm not much for "matchy-matchy" outfits, but I have to admit, paired with the ikat Hudson pants,  the result looks pretty cute on the Zanikan.  This top would also be great with a pair of jeans and it is so very soft!


The bottom line is, don't be too quick to toss aside a length of fabric in which the love is lost.  Chances are, if you re-think your initial design and let your creativity loose, you can probably salvage the love relationship of any fabric!

Come by the store and check out this great Scout Tee top and the wonderful versions of the Hudson Pant I have fallen in love with! We have so many of the FabricLady garments hanging around the store, so be sure to look up as you walk our aisles!

Creatively Yours,
Suzan